Marking Long Interviews in FCPX

Here’s a tip if you have a very long clip like an interview, or maybe you wanted to keep rolling between takes.
In this example we have taken all the little “hosting” spots from our host, Dr. Craig Evans (no relation) and wrapped them together in one large multicam. Now, this may or may not be the best practice, we’re experimenting with it. But it does provide a useful example of a long clip with dead spots.
The big problem here is that when you go to log your footage it is difficult to pin point the exact spot you need to navigate to in the list view.
I recommend selecting the areas of dead space, and rejecting them. Then, as I mentioned before, select each good part of the interview and favorite it.
Make sure the browser is set to sort by “Hide Rejected.”
As you reject dead parts between favorites the browser will create a new listing for each favorited section and eliminate the rejected parts.

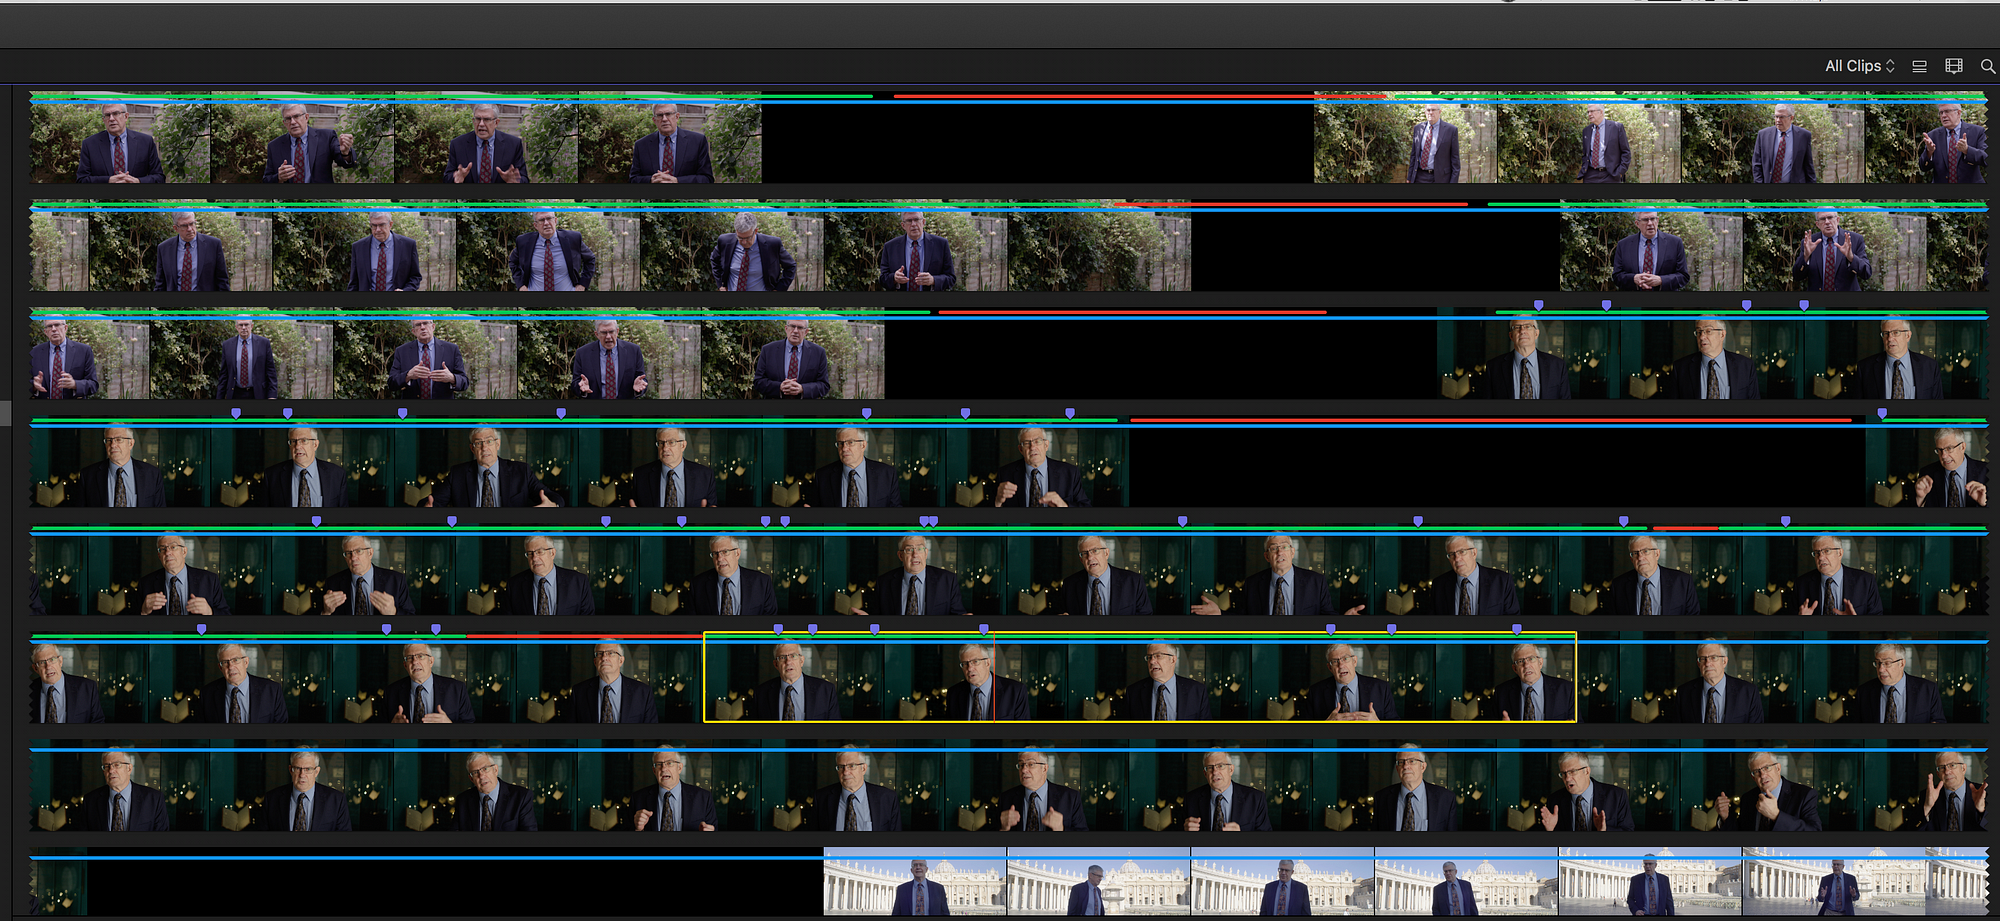
This results in a much finer view. It may look like FCPX has created a new clip, but if you go back to the “All Clips” view you will see the clip as a single unit.

Alternatively, you may want to use the filmstrip view to get a fine-grain look at a long clip.

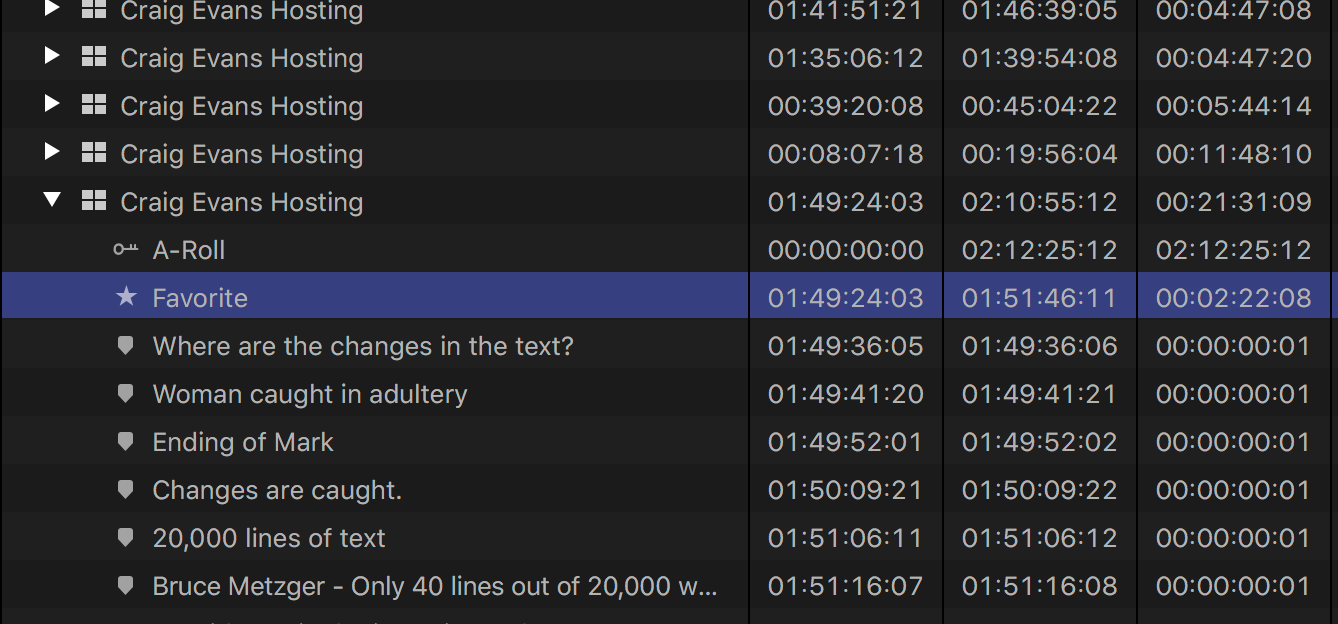
However, during logging I prefer the list view so that I can see the names of the markers that I have used. Click the disclosure triangle next to the clip name to reveal the associated metadata for that clip.

Finally, here’s a tip if you are using a dual screen setup. Place the viewer on the second display and increase the real estate for the browser:
- Press Command + ` to dismiss the “Libraries” sidebar.
- Press Command + 4 to dismiss the inspector.
This produces an expansive view of the clip in the browser. You can even reject a range in the middle of a clip to shorten it down right off the bat.

This article by Reuben Evans originally appeared on Medium here:
https://medium.com/@ReubenEvans/a-tip-for-marking-long-interviews-in-fcpx-367e97e13757


