Audio for Video – Getting it Right
Are you a video editor hoping to add more richness to your audio? In the world of video editing, it’s not uncommon for video editors to rely on others to perform audio post production on their projects. But in this article, we’ll focus on ways that you can get better audio without having others do it for you.
A common thing that hurts many videos is a voice-over track that is not dynamically compressed. It’s all too common where the vocal tracks are recorded on lavaliere mics and that’s it. The audio is captured with the video and placed on the timeline, maybe with a little levels change but little else. This is unfortunate because the audio could sound even better than the original source itself.
COMPRESSORS
For starters, let’s talk about compressed audio. This is not in reference to compressed audio as when you encode something like an MP3 file. Instead, let’s examine dynamic compression. Think of it as an automatic volume control. When the audio level is low, a Compressor increases the gain automatically. When the audio level is high, the compressor decreases the gain automatically. This is a compressor in its most simplistic form. There are obviously additional functions but let’s start there.
Most non-linear applications have dynamic audio filters. In Final Cut Pro, for example, there are several to choose from, such as the built-in FCP “Compressor/Limiter” and the global Apple Audio Units filter, “AUDynamicsProcessor.” Thirdparty audio filters can also enhance the capabilities of your editing software.
If your source audio has really low levels, you should increase the input gain. Realize this will increase the “noise floor” which translates to hiss if excessive. I’ll go over how to reduce this hiss later in the article. The threshold control tells the filter when to actually begin compressing the audio. Listen to your audio and try setting the threshold somewhere around 75% of where it’s peaking. The ratio is the amount of compression that actually occurs. Increasing the ratio too much will cause the audio to sound “squashed” once it reaches or goes beyond the threshold. Finally, make-up gain is used to literally make up the overall level since it’s been compressed. So in its simplest form, you can perform the following steps:
• Set your Input Gain
• Set your Threshold
• Set your Compression Ratio
&bull Set your make-up gain
There are different ways to compress your vocal tracks for different vocal styles. For instance, you might want that fat radio DJ vocal sound for a commercial or a more subtle style for a short film.
Let’s start with input levels. If the original levels of your audio are low (Figure 1), add some input gain to help bring them back up. This may add some hiss because it is raising the “noise floor” – if it does, we’ll reduce the hiss later in the article. Don’t worry if your audio “clips” a little exceeding 0db when it peaks after adding gain; when we compress it, those nasty peaks should go away. Simply increasing the global level won’t always work because there may be areas where the audio peaks will clip (Figure 2).

Figure 1: Original Audio File
I’d set your threshold to somewhere in the middle or top of the db range if your audio has good levels. Keep in mind that all audio levels are different, so if your levels are too low or too high, you’ll have to adjust the threshold accordingly. If you have a good level, somewhere around the 75% peak range should be good.
Set your compression ratio to around 3:1. If you set this ratio too low, you won’t hear much of a compression effect, if any. Set it too high and the audio will squash and sound bad. The initial breath will be louder than the vocal! Anything above 5:1 can sometimes be excessive and is typically reserved for “limiting” as opposed to compressing. We’ll cover more on limiting later on.
There are two other optional functions that may be of help to you when striving for perfect compression. You can use Attack Time to set how quickly the compressor actually starts to compress once the threshold is met. Set this to the faster part of the range, but not necessarily too fast. Your setting will be in the milliseconds. Once the level starts to come back down, you can also set the Release Time. This tells the compressor how quickly or slowly to release the compression amount. If this setting is too slow, it will continue to compress the audio even when the original level has gone below the threshold level. Keep this somewhere in the quick setting range also. With all the combinations in place, you’ll have a fatter audio track with no clipping in the peaks (Figure 3).

Figure 2: Simply adding gain to the level might not be a good idea. In this example, the audio file is clipping dramatically, as evidenced by the flattened edges. While gain has increased the audio levels, it has destroyed audio fidelity.
THAT NASTY HISS
In some unfortunate cases, you may receive audio tracks that were recorded too low in volume. If you raise the input gain, you will undoubtedly increase the noisefloor, which translates into hiss. There are a couple of ways to help counteract this problem when raising the input gain.
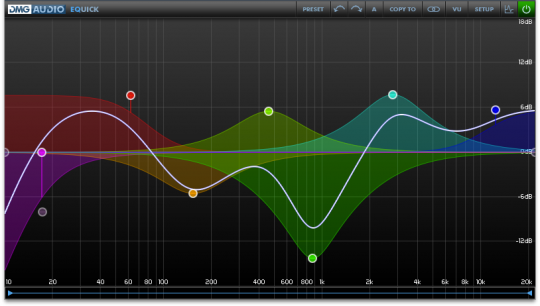
One common thing people do is to try and EQ the hiss out. This can work, but understand that it will affect the main vocal audio and not just the hiss itself. If you feel that you must EQ the hiss out, then use a Parametric EQ and not a Graphic EQ or Two or Three Band EQ. With a Parametric EQ you can dial in the frequency you need to cut out using its settings for gain/cut, frequency and “Q”.
ISOLATING BY MAGNIFYING
Even though we’ll be cutting the desired frequency, we’ll first want to boost the frequency by an exaggerated amount. This will help us dial in the frequency much easier. Crank the gain on the EQ setting, probably around 12db or more. Then with your actual frequency setting, keep dialing that up and down the frequency range when the actual hiss begins to get really loud.

Figure 3: Properly compressed audio with fatter levels and no clipping.
When you’ve zoned in on the frequency range of the hiss, set your “Q”. The “Q” sets how wide or narrow the frequency range is that you’ve selected. Too wide of a “Q” and you’ll cut out both the hiss frequency and other frequencies around it. Set the “Q” too narrow and you might only cut part of the hiss out.
Once you’ve selected the frequency and the “Q” settings, you can now cut the EQ gain on that frequency range you’ve just dialed in. Be careful with how much you cut! You might also want to play a little with the frequency range and “Q” again to help dial out the hiss for best results.
Another method to cutting hiss and typically more preferable, is using a Gate. In its most simplistic form, a gate turns the audio off (closed) or turns audio on (open); all specified by a selected threshold level you set. A gate doesn’t change or alter the levels of the audio like a compressor does, it simply turns the audio on or off. By playing with the threshold level, you can hear when the hiss gets cut out and the vocal cleanly comes in. Be careful because if your threshold is too high, you might cut out some of the “breath” sounds of the voice and it’ll sound like it’s popping in and out. A highquality gate will have a smooth transition from closed to open. Poor quality gates will sound choppy or will even possess static in the transition.

Figure 4: Note how the portions that don’t have audio are completely gated out while some of the low-audio waveforms are still kept in.
When the gate is open, the hiss will be there. However, the vocal audio will typically cover up the hiss at that point. Sometimes using a combination of both EQ and Gate can give very desirable results in reducing hiss. The more you play with it, the better you’ll get at dialing it in.
OTHER AUDIO DYNAMICS
You can also add compressors that compress based on specified frequency ranges. For instance, your low frequencies might compress more than your really high frequencies. Maybe compress more around that nasty hiss zone. Another form of compression is by the use of “side-chaining” where one audio signal causes another audio signal to lower its gain (very common in the radio DJ arena where the music automatically lowers when the DJ speaks).
Some other simple tools you can look into are De-Essers. With high sibilance sounds, like saying the word, “sissy,” you can lessen the amount of “ss” if it’s too piercing or even “whistley” sounds. A de-esser is a kind of easy-to-use parametric EQ but with some added features specific to canceling out excessive sibilance problems.
It might be a good idea to also use a Peak Limiter in your audio track, especially if the audio track is long and you don’t have time to systematically go through the whole thing to see where it might peak beyond 0db. A limiter is basically a compressor but with a higher threshold and a much higher ratio. So a limiter might be preset to start working (the threshold point) at around 10% of 0db. At that threshold point, a huge amount of compression comes in (at least 5:1, probably more) and lowers the volume right before it peaks. The attack time will be very fast as will the release time. A limiter is mostly a safeguard (especially in live recording scenarios). So in the postproduction process, I wouldn’t rely on it too heavily.
There are other audio tools that can make the overall audio appear to sound better. Some of these tools are known as maximizers or exciters. Be conservative with these tools as they can sometimes play with the phasing of the audio. This could potentially be a problem if your audio gets mixed to mono at a later stage.


